
之前公司服务器上php版本太老了,导致本地和服务器的php版本差异太大,上线经常抱错,于是决定再多安装一个php新版本,另外为了避免对已经上线的服务产生影响,所以要确保新安装的php版本是独立的,和之前的版本不冲突。
结果安装的时候就是各种小问题,所以特意记录下,也希望能帮助到同样困惑的人。
第一部分是在linux系统上多安装一个PHP版本;
第二部分集中我遇到的问题及解决方案。
让我们开始:
编译安装PHP
1.
预先安装必要的依赖
这里并不完整,也不是必需的步骤,但可以省去一些麻烦。
yum install -y \
wget \
gcc \
gcc-c++ \
autoconf \
automake \
libtool \
make \
libxml2 \
libxml2-devel \
openssl \
openssl-devel \
sqlite-devel
2.
下载并解压 PHP 版本
这里就直接使用php官网提供的包进行编译,避免了各种镜像库的网络问题。
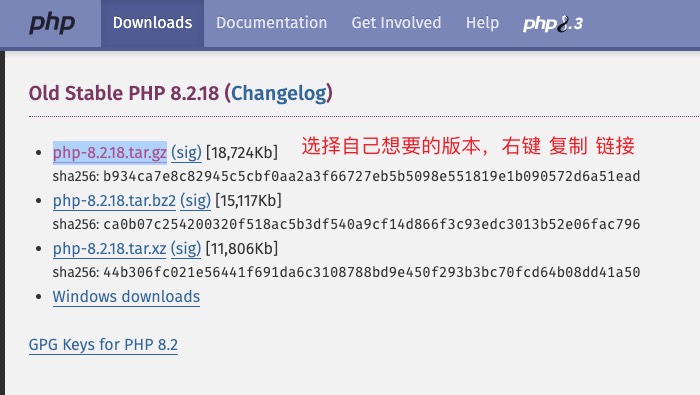
先打开 PHP 官网,查看可用的版本:
选择自己想要安装的 PHP 版本,然后鼠标右键,选择复制链接
使用下面命令下载,并解压文件:
# 网址那一段,应该换成你自己复制的网址
wget https://www.php.net/distributions/php-8.2.18.tar.gz && \
tar -zxvf php-8.2.18.tar.gz  && \
cd php-8.2.18
3.
配置编译文件
这一步目的是通过自定义配置,生成编译的文件。
头两行表明了要安装的 PHP 目录及 PHP 配置的目录,我这里参考了宝塔面板的目录结构,这样各个版本比较清晰的,如果你想使用不同的目录,可以自行替换:
(这一步遇到报错会比较多,你可以参考第二部分寻找答案,解决问题后再重复此步骤即可)
./configure --prefix=/www/server/php/82 \
--with-config-file-path=/www/server/php/82/etc \
--enable-fpm \
--with-fpm-user=www \
--with-fpm-group=www \
--enable-mysqlnd \
--with-mysqli=mysqlnd \
--with-pdo-mysql=mysqlnd \
--enable-mysqlnd-compression-support \
--with-zlib \
--enable-xml \
--disable-rpath \
--enable-bcmath \
--enable-shmop \
--enable-sysvsem \
--with-curl \
--enable-mbregex \
--enable-mbstring \
--enable-intl \
--enable-ftp \
--enable-gd-jis-conv \
--with-openssl \
--with-mhash \
--enable-pcntl \
--enable-sockets \
--enable-soap \
--with-gettext \
--enable-fileinfo \
--enable-opcache \
--with-pear \
--with-ldap=shared \
--without-gdbm
4.
执行安装
make && make install
如果一切顺利,最终你会看到这个:
+--------------------------------------------------------------------+
| License:                                                           |
| This software is subject to the PHP License, available in this     |
| distribution in the file LICENSE. By continuing this installation  |
| process, you are bound by the terms of this license agreement.     |
| If you do not agree with the terms of this license, you must abort |
| the installation process at this point.                            |
+--------------------------------------------------------------------+

Thank you for using PHP.
5.
创建快捷方式
这一步不是必须的,只是为了方便后面通过命令来测试
可以通过创建一个符号链接,将 PHP 8.2 的可执行文件 /www/server/php/82/bin/php 映射到 /usr/local/bin/php8,这样就可以使用 php8 命令即可调用 PHP 8.2 的解释器:
(注意:要替换为自己的 PHP 目录)
ln -s /www/server/php/82/bin/php /usr/local/bin/php8
之后就可以进行测试了:
php8 -v
# 就可以看到输出
PHP 8.2.18 (cli) (built: May  6 2024 14:28:53) (NTS)
Copyright (c) The PHP Group
Zend Engine v4.2.18, Copyright (c) Zend Technologies
6.
修改配置文件
这里先复制出一些默认的配置出来:
# 此时位于:/www/download/php-8.2.18/
cp php.ini-production /www/server/php/82/etc

cd /www/server/php/82/etc
cp php.ini-production php.ini
cp php-fpm.conf.default php-fpm.conf

cd /www/server/php/82/etc/php-fpm.d
cp www.conf.default www.conf
因为我们要保留之前的版本,此时就有多个 PHP 版本。
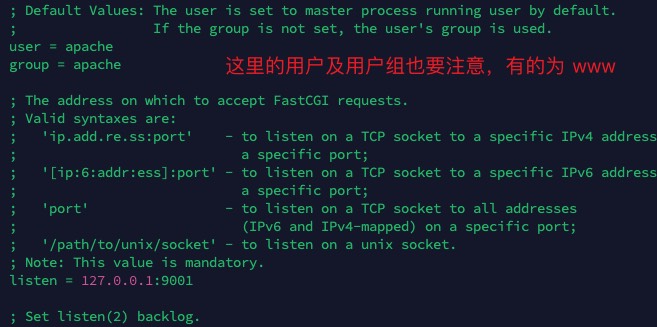
PHP 默认监听的端口是 9000 , 如果两个版本都开启的话, 那么肯定会冲突, 所以需要修改新版本的 PHP 监听其它端口,这里我修改为 9001。
编辑新版本的 PHP 配置文件:
vim /www/server/php/82/etc/php-fpm.d/www.conf
将其中的监听端口修改为 9001:
listen = 127.0.0.1:9001
7.
启动新版本 PHP 服务
# 此时位于:/www/server/php/82
sbin/php-fpm
8.
修改网站的服务配置
这个需要根据服务器的网页服务来配置,这里以 Nginx 为例,修改网站的虚拟配置文件:
vim /etc/nginx/vhost/www.shejibiji.com.conf
将其中有关 PHP 服务的那块,端口改为 9001:
server
{
    ### 省略 ###
    location ~ \.php$ {
          fastcgi_pass   127.0.0.1:9001;
          # fastcgi_pass unix:/www/server/php/82/php-fpm.sock
          fastcgi_index  index.php;
          fastcgi_param  SCRIPT_FILENAME  $document_root$fastcgi_script_name;
          include        fastcgi_params;
   }
   ### 省略 ###
}
重新加载 Nginx 配置:
nginx -s reload
9.
完成配置,测试结果
可以在网站上创建一个页面显示phpinfo()信息,然后访问:
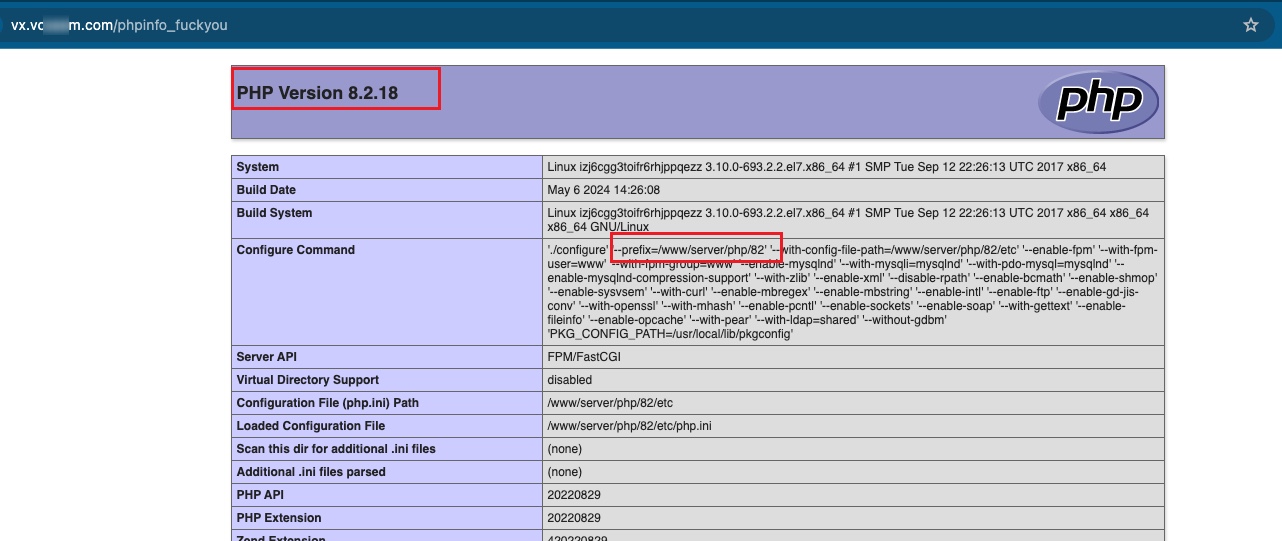
(成功在单独的业务网站上使用了独立的php新版本)
10.
设置php-fpm为开机启动
编辑php-fpm.conf文件, 将pid的注释打开
这样就可以方便的控制和监控 PHP - FPM 进程。(如果需要通过设置服务启动,这个也是非常必要的)
pid = run/php-fpm.pid
# 此时位于:/www/download/php-8.2.18/sapi/fpm
cp php-fpm.service /usr/lib/systemd/system/php-fpm-82.service
# 启动服务
systemctl enable php-fpm-82
# 验证一下是否为开机启动
systemctl is-enabled php-fpm-82
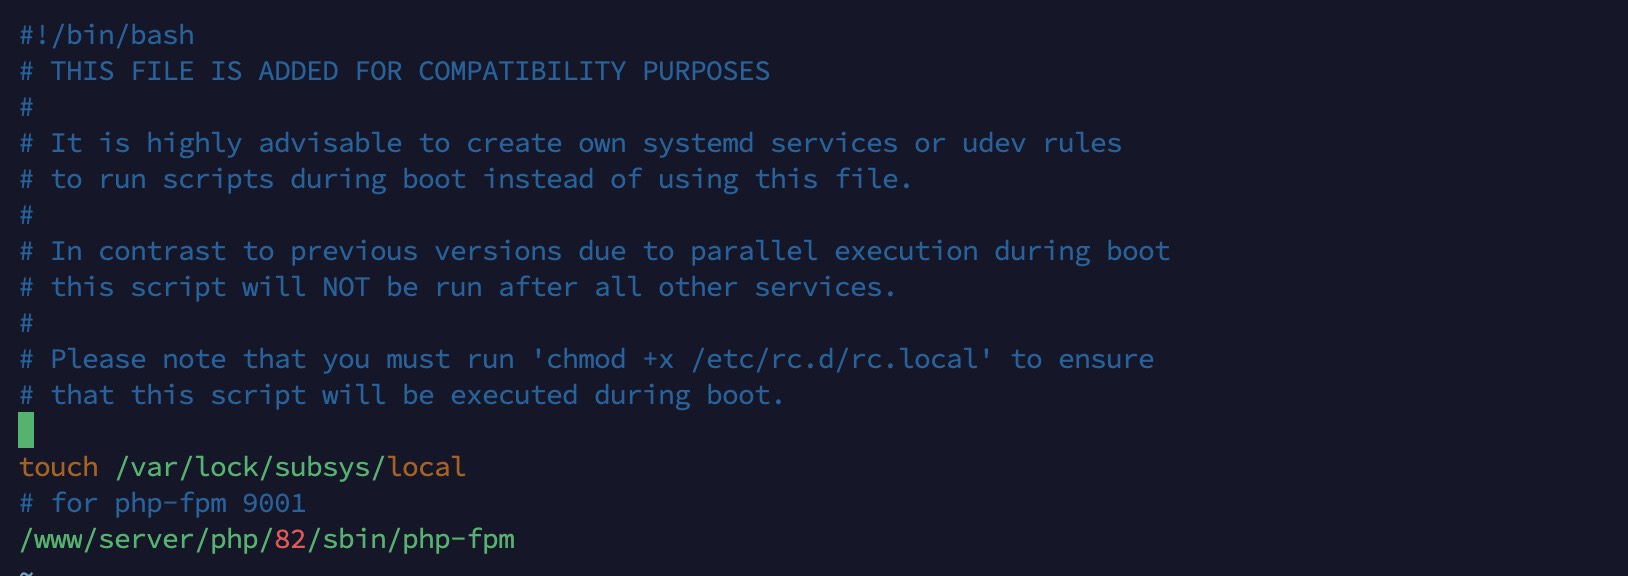
下面方法也可以达到效果,但不推荐使用(官方已经不推荐)
编辑/etc/rc.d/rc.local文件, 加入php-fpm的配置
问题报错及解决方案
1.
make 时无法找到 makefile
make *** no targets specified and no makefile found. stop
这是因为配置那一步没解决报错问题,没有生成有效的 makefile 文件,请回到上一步,解决掉出现的错误,完成配置这一步。
2.
配置时错误,Package requirements (libcurl >= 7.29.0) were not met
configure: error: Package requirements (libcurl >= 7.29.0) were not met:
libcurl 版本不满足,那么就升级下,分别执行:
第二行的地址,你可以替换为自己想要的版本,在这里查看官方发行:https://curl.se/download/
yum install wget gcc openssl-devel -y
wget https://curl.se/download/curl-8.7.1.tar.gz
tar -xzvf curl-8.7.1.tar.gz
cd curl-8.7.1
./configure --with-ssl --prefix=/usr/local/curl
make && make install
echo "export PATH=/usr/local/curl/bin:$PATH" >> /etc/profile
source /etc/profile
# 测试
curl --version
# 输出
curl 8.7.1 (x86_64-pc-linux-gnu) libcurl/8.7.1 OpenSSL/1.0.2k-fips zlib/1.2.7
Release-Date: 2024-03-27
Protocols: dict file ftp ftps gopher gophers http https imap imaps ipfs ipns mqtt pop3 pop3s rtsp smb smbs smtp smtps telnet tftp
Features: alt-svc AsynchDNS HSTS HTTPS-proxy IPv6 Largefile libz NTLM SSL threadsafe UnixSockets
3.
多个无法找到 xxx 的错误
(解决方式就是缺少啥安装啥)
- Cannot find ldap.h
configure: error: Cannot find ldap.h
# 解决
yum install openldap-devel
- Cannot find ldap libraries in /usr/lib.
configure: error: Cannot find ldap libraries in /usr/lib.
# 解决
cp -frp /usr/lib64/libldap* /usr/lib/
- No package 'oniguruma' found
No package 'oniguruma' found
# 解决
yum install -y oniguruma-devel
- No package 'libcurl' found
configure: error: Package requirements (libcurl >= 7.15.5) were not met:
No package 'libcurl' found
# 解决
yum install libcurl-devel
- Package requirements (libxml-2.0 >= 2.7.6) were not met
configure: error: Package requirements (libxml-2.0 >= 2.7.6) were not met:
No package 'libxml-2.0' found
# 解决
yum install libxml2-devel
- No package 'openssl' found
configure: error: Package requirements (openssl >= 1.0.1) were not met:
No package 'openssl' found
# 解决
yum install openssl-devel
- Package requirements (icu-uc >= 50.1 icu-io icu-i18n) were not met
configure: error: Package requirements (icu-uc >= 50.1 icu-io icu-i18n) were not met:
No package 'icu-uc' found
No package 'icu-io' found
No package 'icu-i18n' found
# 解决
yum install libicu-devel
可能还有其它类似问题,都可以通过安装对应包来解决。
4.
make 时错误,内存不足
virtual memory exhausted: Cannot allocate memory
make: *** [ext/fileinfo/libmagic/apprentice.lo] Error 1
可以先使用交换分区来解决:
# 存放 swap
mkdir /home/images
rm -rf /home/images/swap
dd if=/dev/zero of=/home/images/swap bs=1024 count=2048000
mkswap /home/images/swap
# 启用 swap
swapon /home/images/swap
# 关闭 swap(结束后关闭)
swapoff /home/images/swap
rm -rf /home/images/swap
rm -rf /home/images
可以使用命令查看 swap 情况:
# 以 MB 为单位显示
free -m
5.
启动新的 php-fpm 时提示无法找到用户
ERROR: [pool www] cannot get uid for user 'www'
ERROR: FPM initialization failed
这是因为配置中的用户及用户组不对,可以参考已经存在之前的php配置进行修改,比如我公司之前的用户及用户组都是 apache,那么就要都修改为 apache,就可以使用了。
如果是新安装 PHP,可以直接创建该用户及用户组也可以解决:
groupadd www
useradd -g www www
systemctl restart php-fpm
2024年7月17日 下午7:36 1F
额 。PHPER常识
2024年7月18日 上午11:32 B1
@ 马季 我确实还在学习中